The studio, part by part
Tutorial · 10 minutes
Your first video
A launch video from one sentence and two photos: planned, made, changed by pointing at it, and shared.
Tutorial · 20 minutes
Effects and timing
A watch film from a photo and a logo: a clip made in Generate, effects asked for precisely, a voice found in the chat, and the cut and the name on the beat.
The studio at a glance
A project opens in the studio. Each part has a number below, and the rest of this guide takes them one at a time.
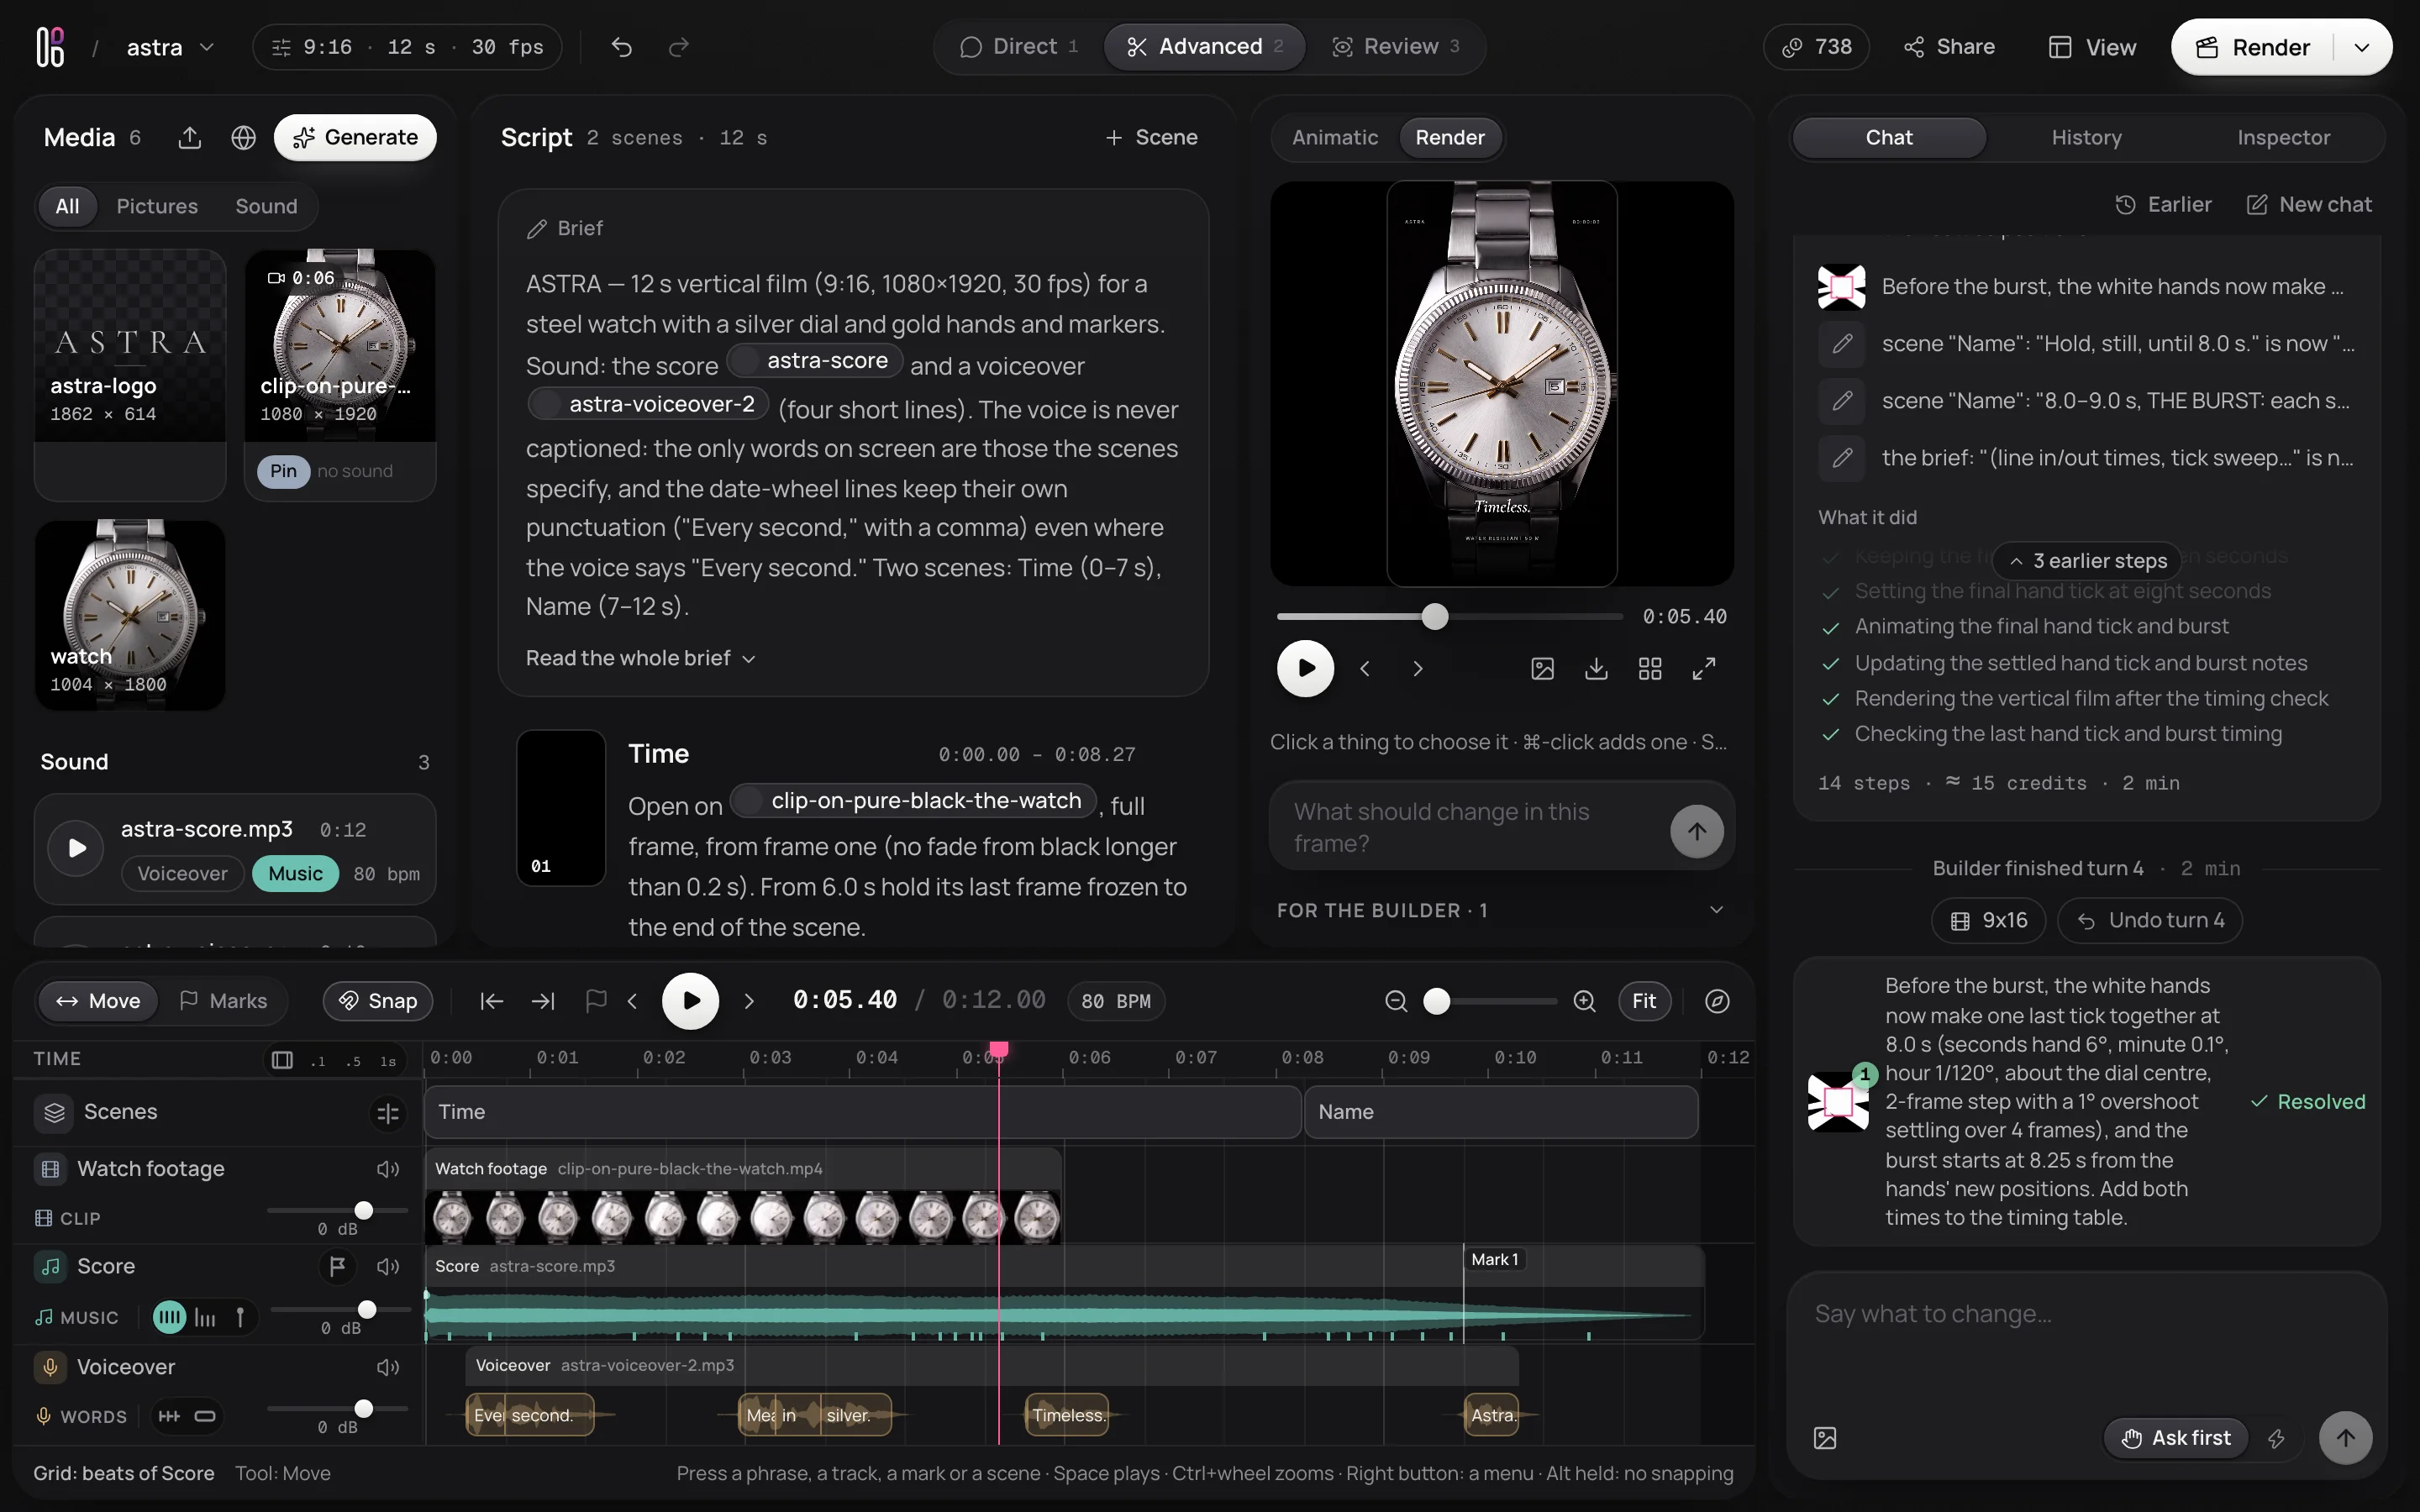
Point at a number, or at a line here, to light up its part.
- Media your pictures, clips, sound and colours.
- Script the plan in writing: the brief, then each scene.
- Animatic and render a sketch of the video from the plan, and the render once it is made.
- Chat where you plan with Klistra. History and the Inspector, which shows everything about what is selected, sit beside it.
- Timeline the plan in time: scenes, recordings, phrases and beats.
- Undo and redo for every change, yours or the chat's.
- Workspaces Direct, Advanced and Review.
- Credits what you have left.
- Share a link to the renders.
- Build or render always the next step: here the render, after a build.
Starting a project
On the home page, describe what to make in a sentence or two, the way you would brief a designer: what it is for, how it should feel, what it must say. Drop in what you have: photos, footage, a logo, music, a voiceover. Klistra reads the length, the sizes and the kind from your words, such as a 15 second ad for Reels and a square post, and you can change them on the chips under the box before you start.
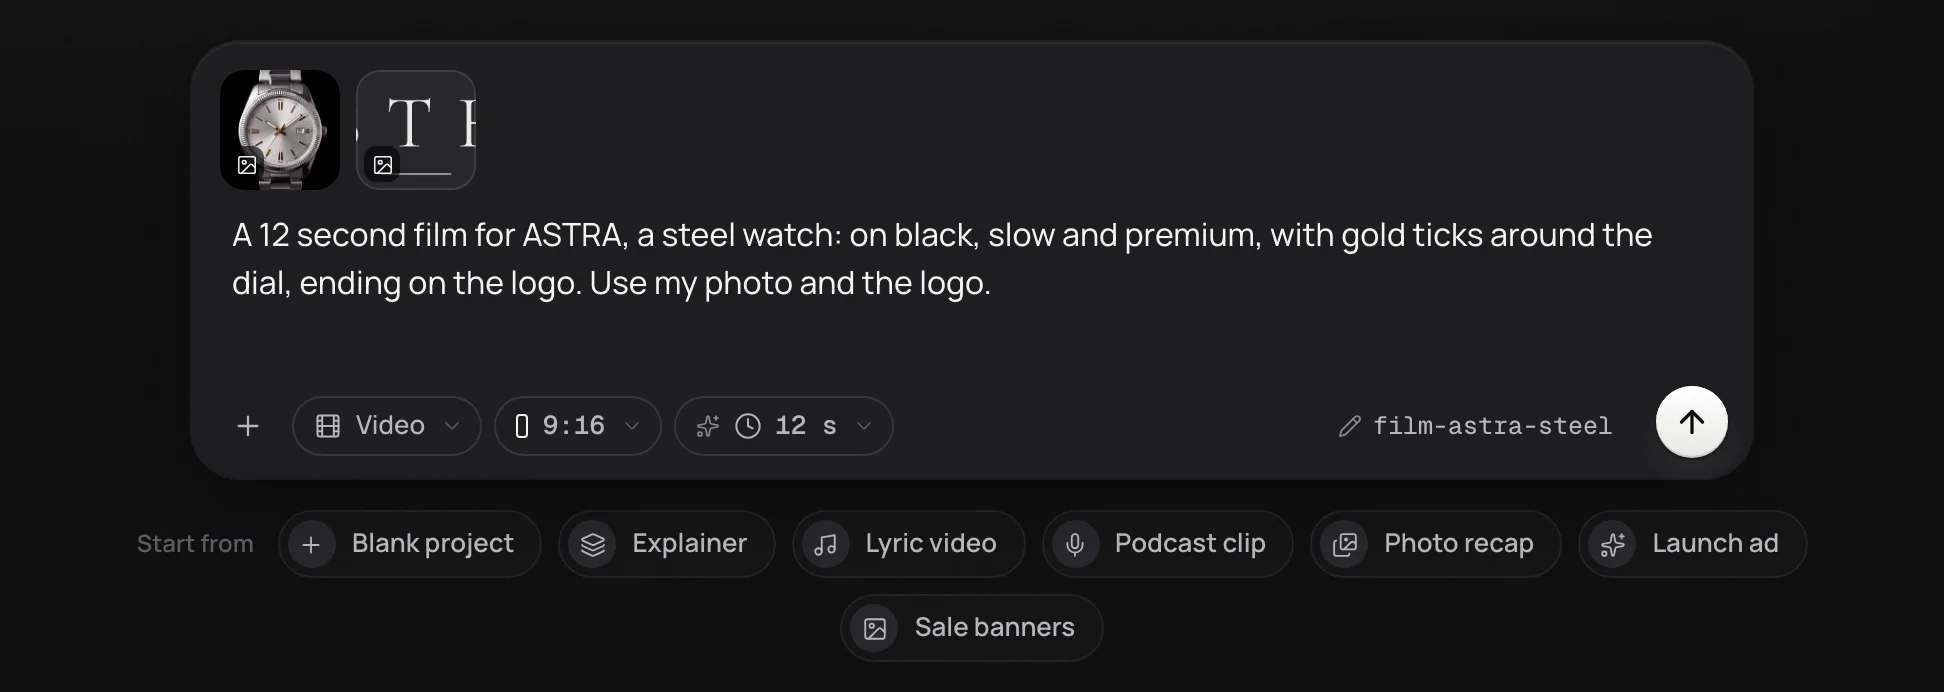
Point at a number, or at a line here, to light up its part.
A project can be a video or a picture. A picture has sizes but no timeline, and everything else works the same way. You can also start from a website: paste its address, and Klistra reads its logo, its colours and its words to work from.
The chat
The chat is where you plan with Klistra. Say what you want, and it writes the plan: the brief, the scenes and what each shows, the words on screen, the colours, and when everything happens. Every change it makes is listed under its answer, shows up at once in the script, the timeline and the sketch of the video, and can be undone.
- Name your media with @, as in open on @hero-shot.
- Ask for changes in plain words: make the second scene shorter, put each scene change on a beat, warmer colours.
- It can make media for the project, such as a voiceover, music, a sound or a picture. With Ask first on, it asks before anything that costs credits, with the price; switch to auto when you trust it.
- A message can wait its turn: write the next one while it answers.
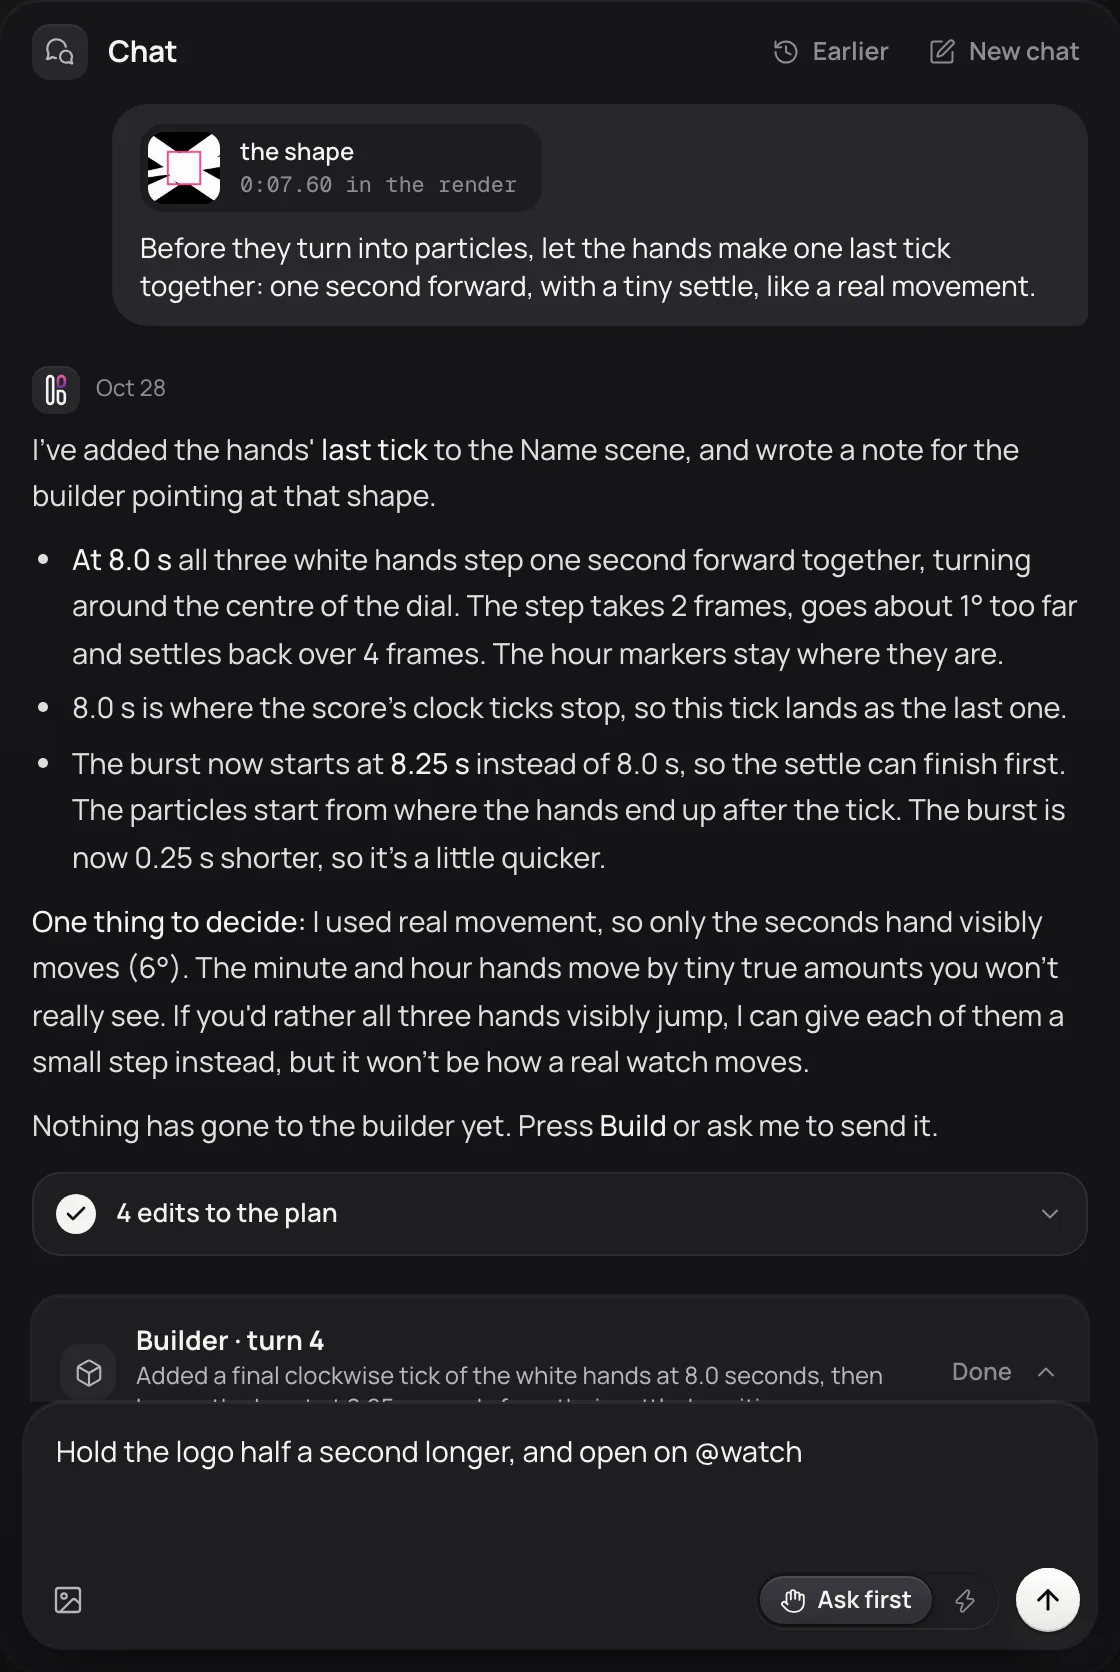
Point at a number, or at a line here, to light up its part.
Media
Everything you add lives under Media: pictures, clips, music and recordings. Drop files anywhere on it. A recording is marked as voiceover, as music, or as both, and it is measured as it comes in: the beat, bars and entries of music, and the phrases and words of a voice, in its own language. That is what lets phrases land on beats later.
Colours live there too: add the colours of the brand, or paste a hex code, and name them in the chat or the script.
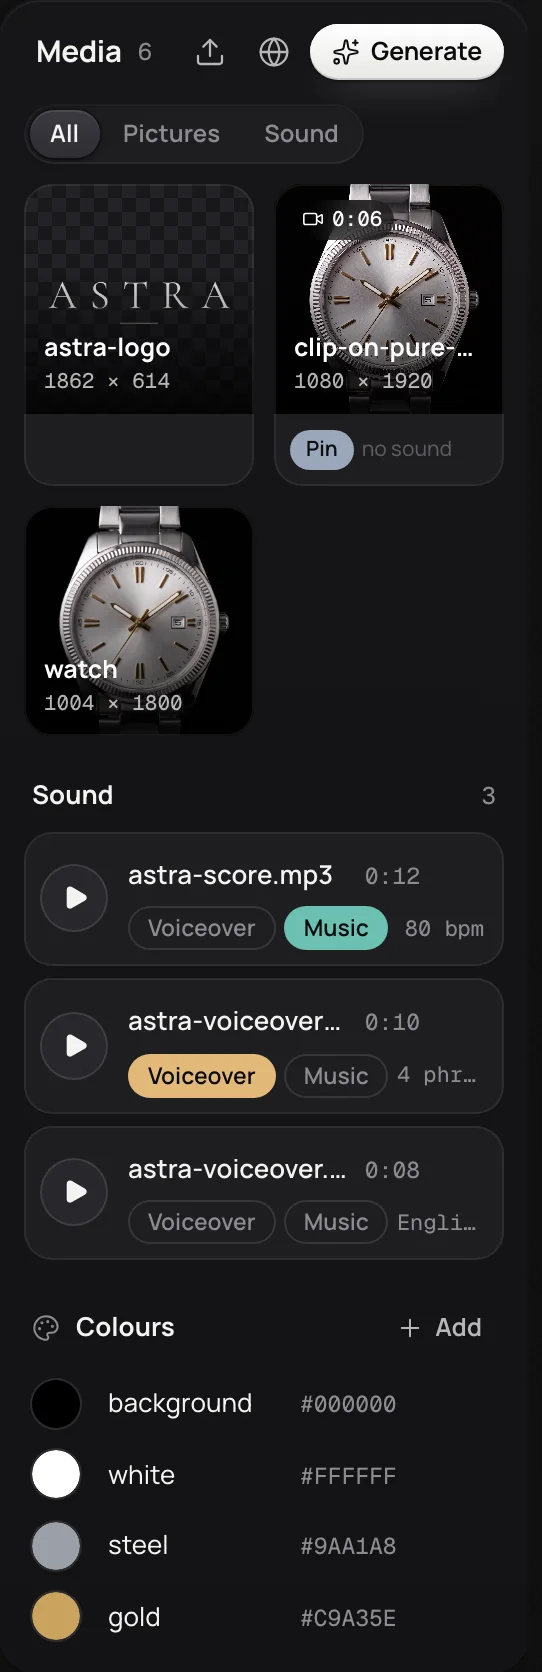
Point at a number, or at a line here, to light up its part.
Making media
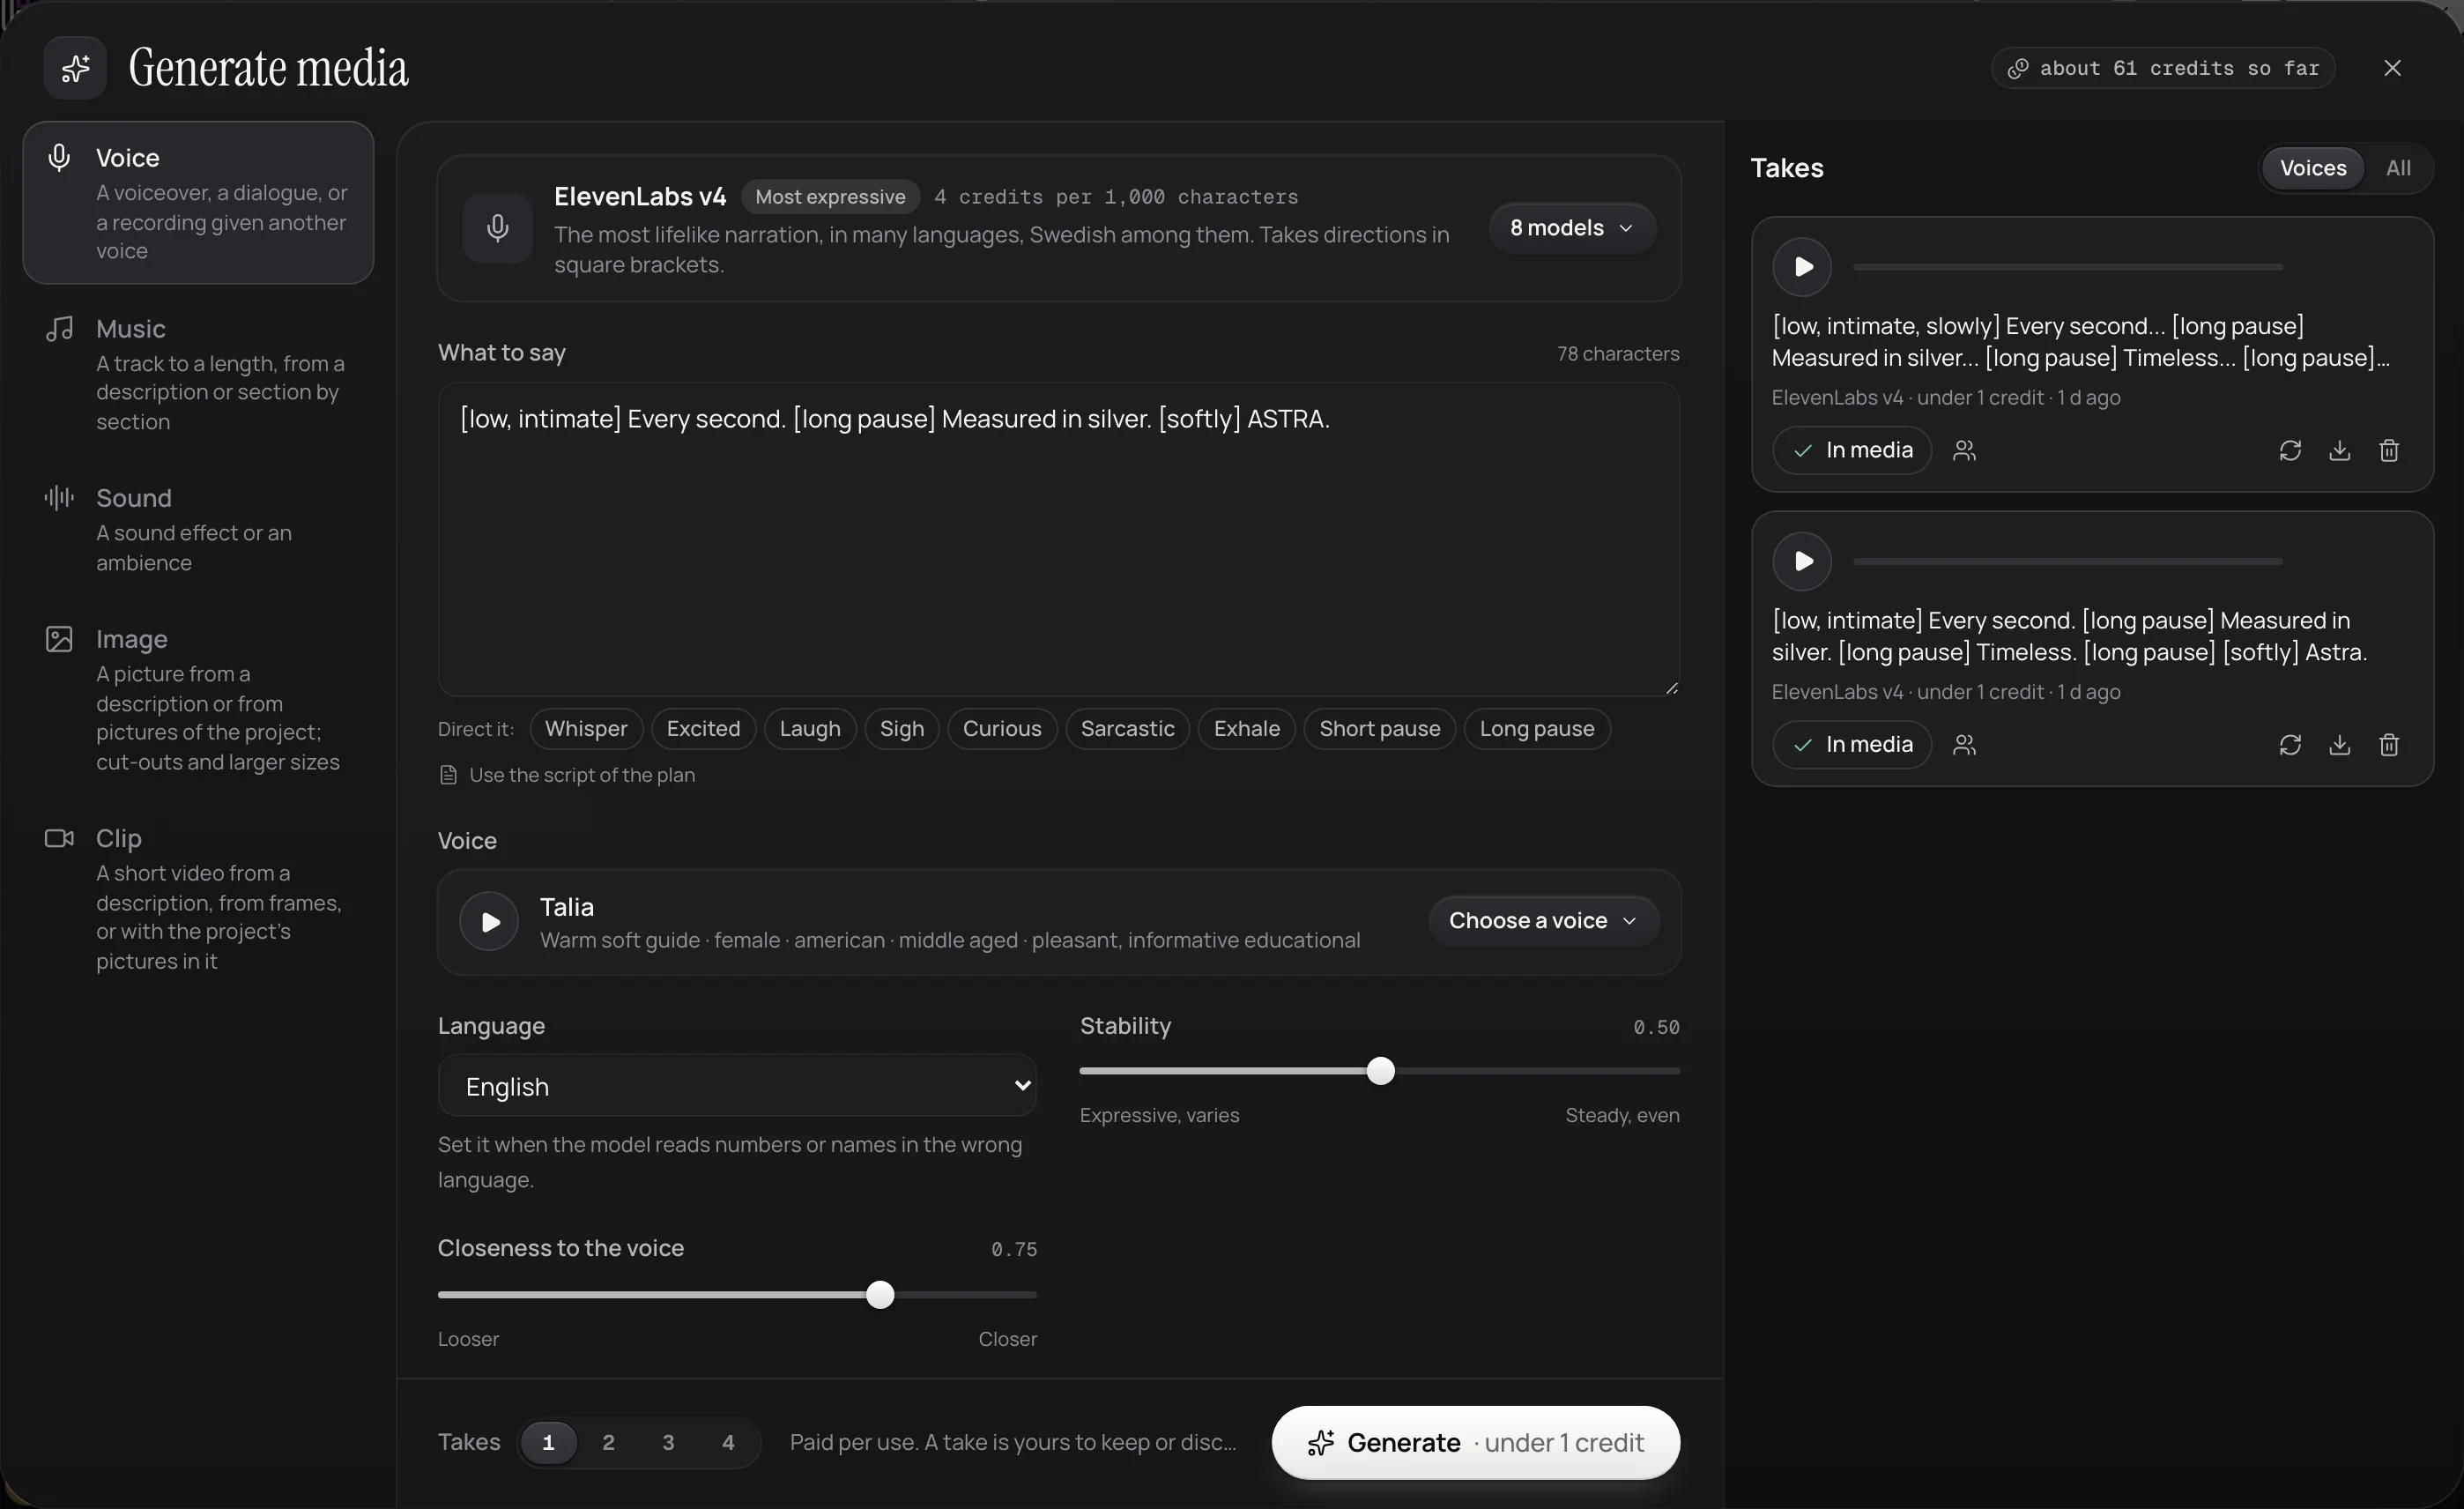
Generate, at the top of Media, makes what you do not have: a voiceover from a script, a conversation between voices, music to a length, a sound effect, a picture from a description or from your own pictures, or a short clip. Each model says what it is good for and what it costs before it makes anything. Make two takes, keep the one you like, and it joins the media.
Voiceovers take directions in square brackets in the middle of the words, such as [whispers], [excited] or [long pause], to shape the delivery.
Point at a number, or at a line here, to light up its part.
Choosing a voice
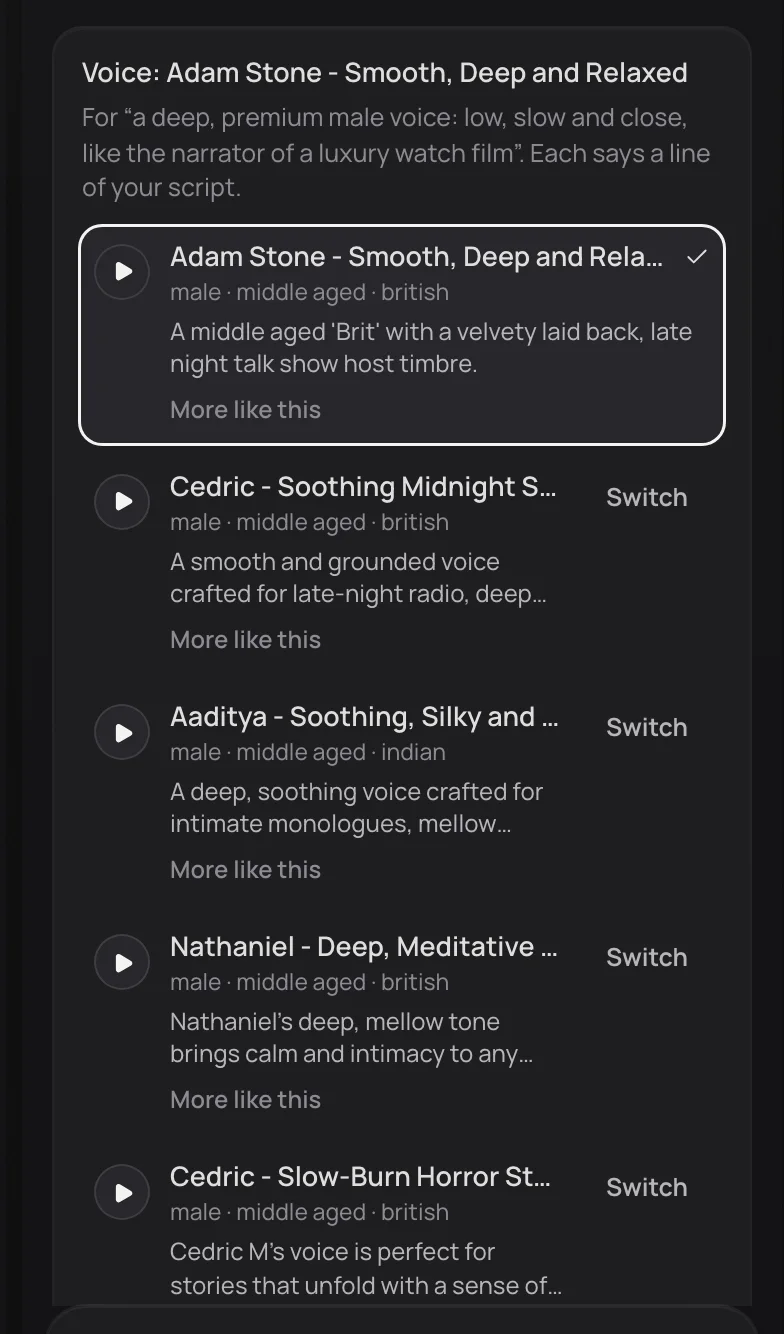
Ask the chat for a voiceover and it offers five voices from a library of thousands, each saying the first line of your script. Describe the voice however comes naturally, even by one you know: a deep, warm narrator, like the nature documentaries. Choose one, ask for more like this with how it should differ (a little younger, more gravel), or say none of them fit.
Each take is listened to against how it was meant to sound, so a flat or rushed read is made again before it reaches your video.
Point at a number, or at a line here, to light up its part.
The script
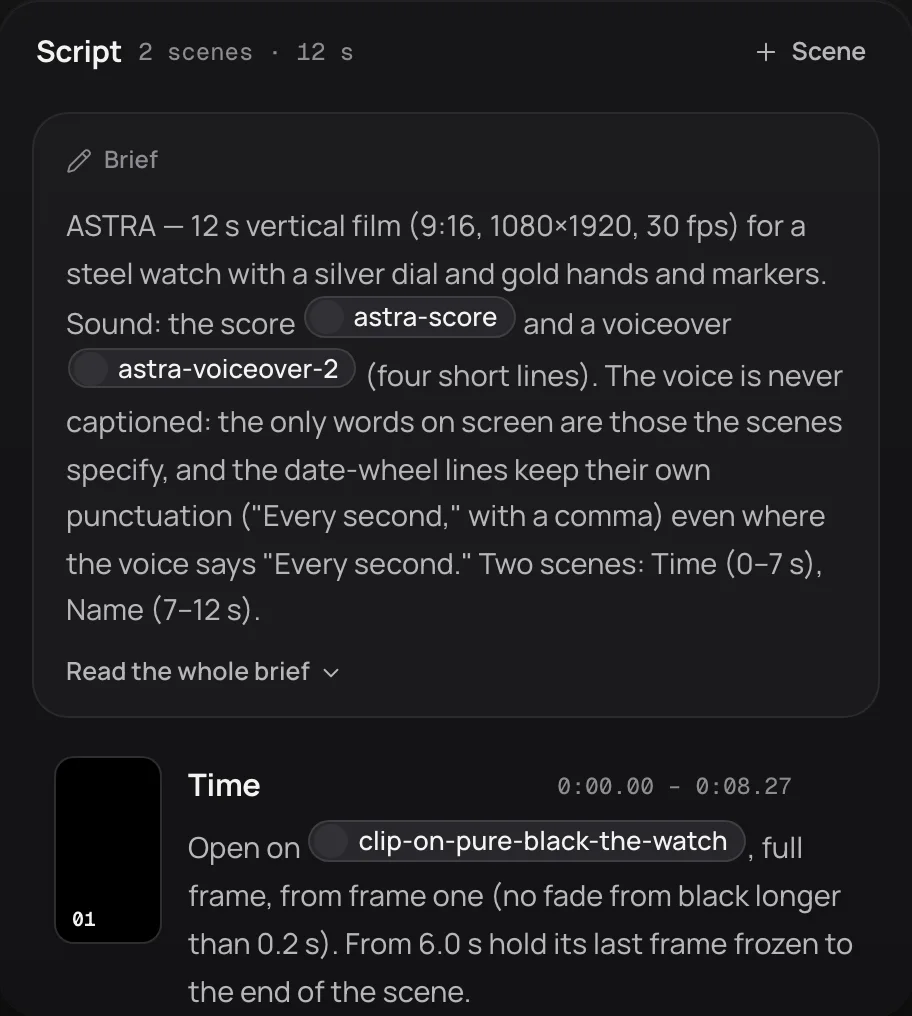
The script is the plan in writing: the brief at the top, then each scene with its time and what it shows. Edit any of it in place. Name media, marks and colours with @, and they appear as chips. Add a scene with the button at the end. The chat reads and writes the same script, so what you change by hand, it sees.
Point at a number, or at a line here, to light up its part.
The timeline
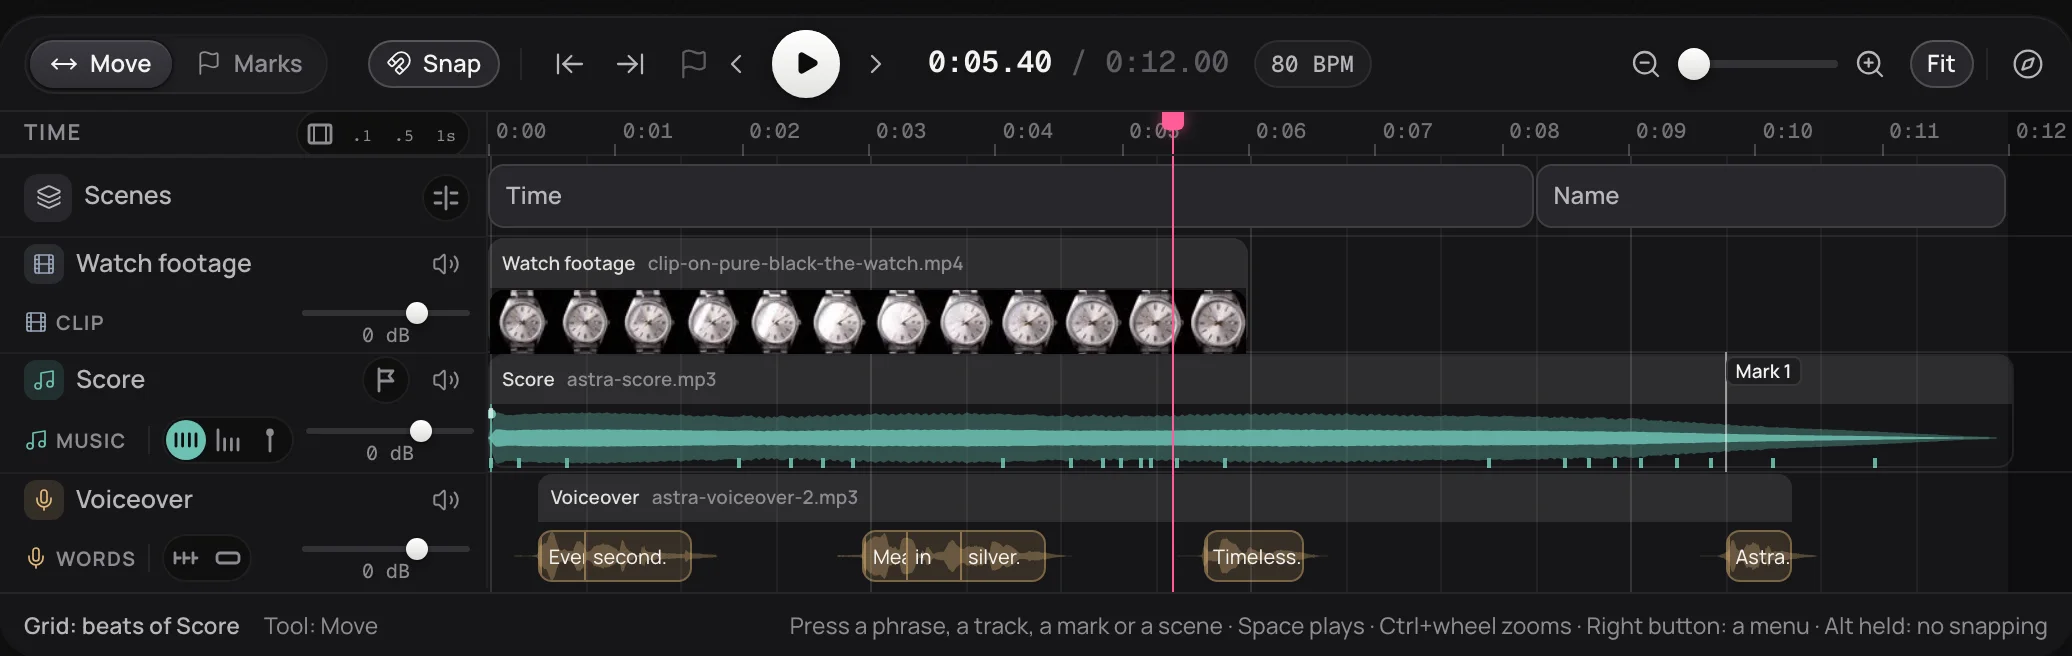
The timeline shows the plan in time: the scenes on top, a row for each recording under them, the phrases of a voice, and the beats of the music. Drag a scene, its edge, a phrase or a whole recording to move it, and everything snaps to the grid you choose: the beats or bars of the music, the words of a voice, the scene edges, or frames.
Point at a number, or at a line here, to light up its part.
The timeline has its own walk-through: press the compass at its top right in the studio. Effects and timing goes through it step by step.
Making the video
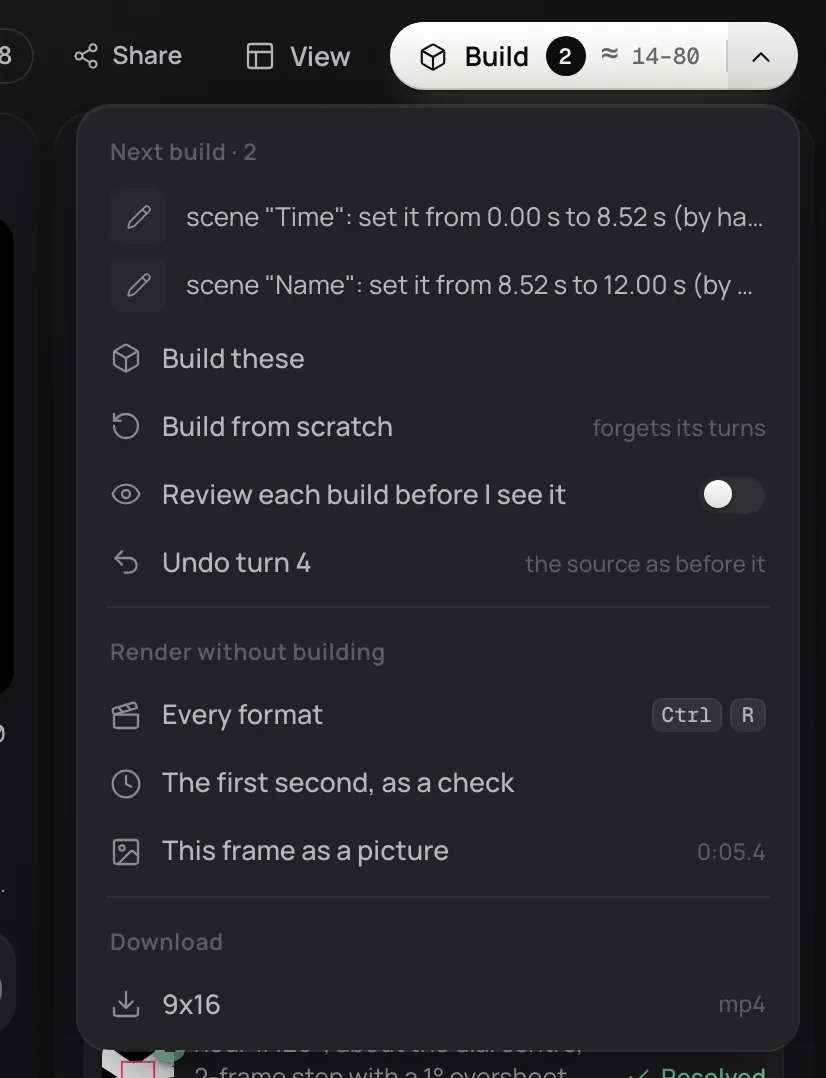
When the plan looks right, press Build. Klistra makes the video in the background and renders it in every size you chose; the button says roughly how many credits it will take first, and the chat shows what it is doing as it goes. Keep changing the plan meanwhile: what changed is listed on the button and sent with the next build.
A fresh look follows each build when review is on: anything below the bar is fixed straight away, before you see it.
Point at a number, or at a line here, to light up its part.
Reviewing a render
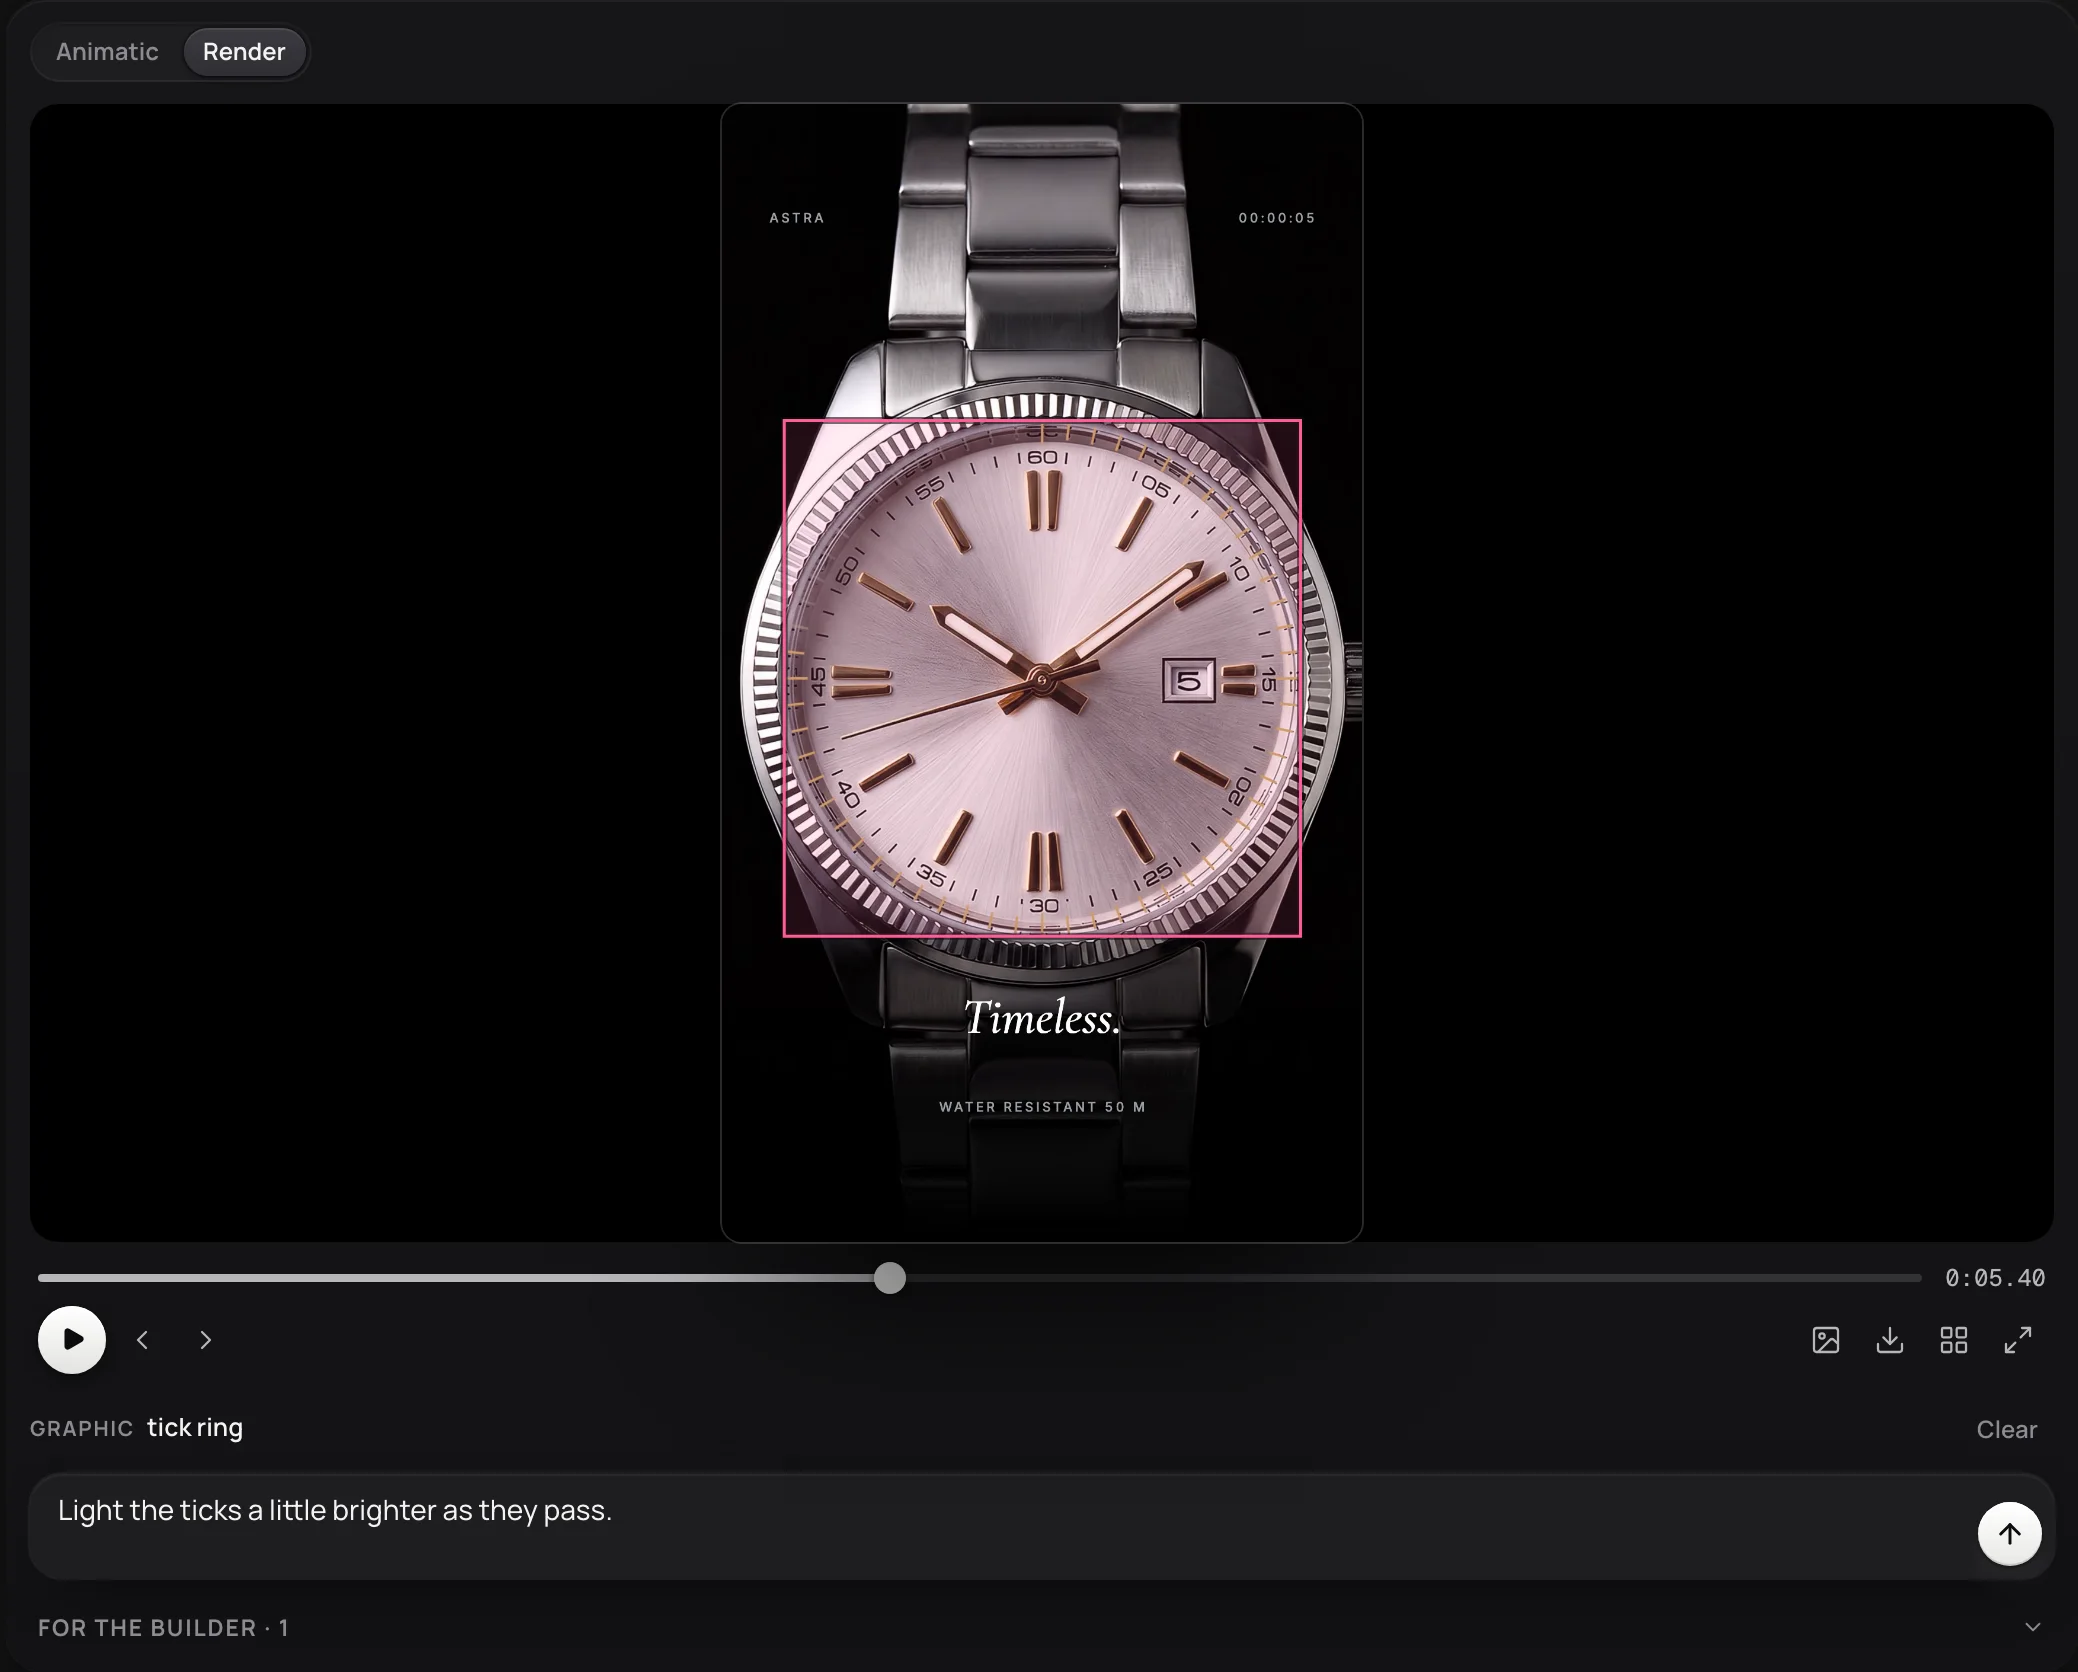
The render plays where the sketch was. Click anything in it, a headline, a picture or a shape, and say what should change about just that: make this bigger, this should come in later. Click again to choose what lies beneath. Your comment goes to the chat with a picture of what you pointed at, and comes back as a note pinned on that frame, waiting for the next build.
You can render a range of frames to check a moment quickly, keep any frame as a picture, and watch on a phone, where the notes sit in a sheet under the video.
Point at a number, or at a line here, to light up its part.
History and undo
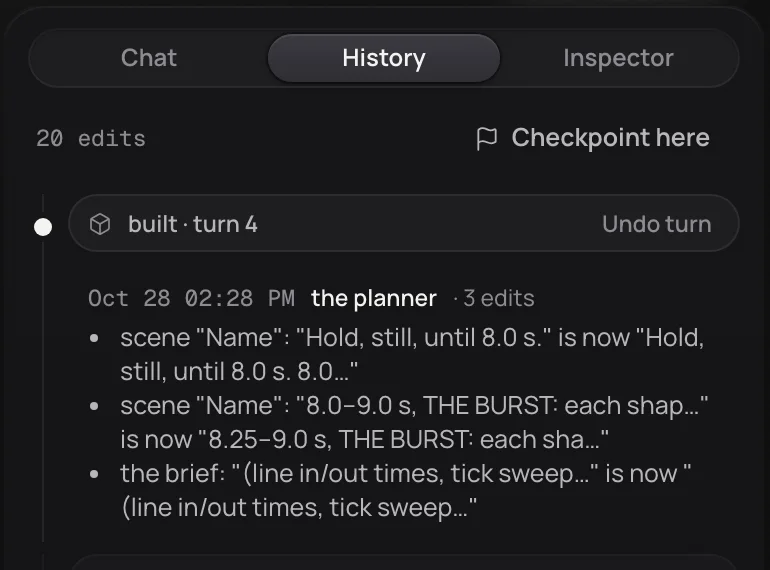
Every change, by you or by the chat, is a version. Undo and redo are always there; History lists every version with who made it, shows what changed, and goes back to any of them. Name a checkpoint before a big change to find it again.
Point at a number, or at a line here, to light up its part.
Sharing and downloading
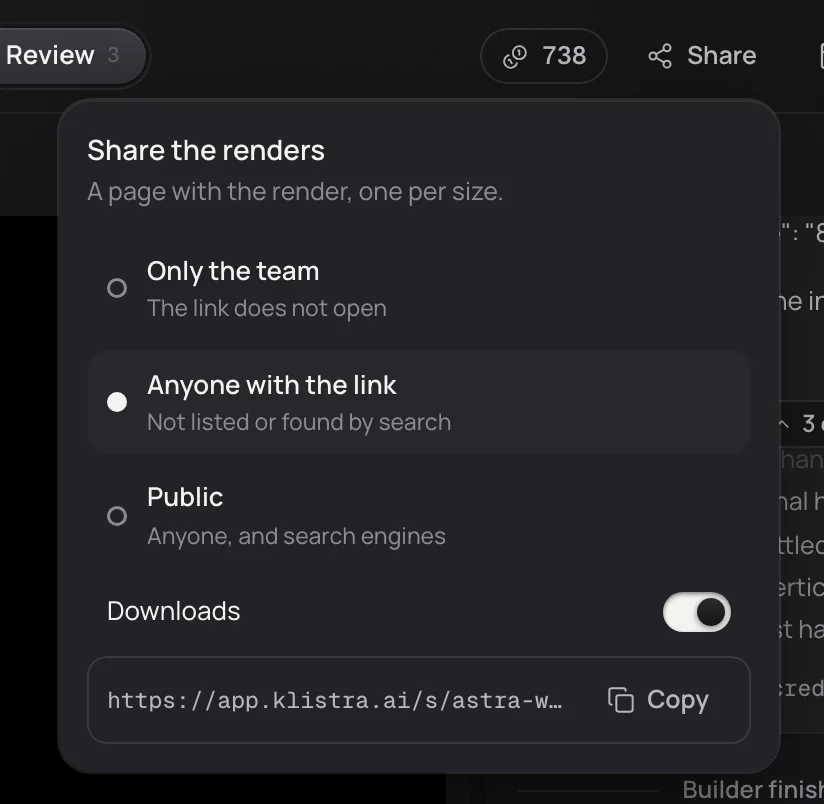
Share gives a link to the renders that works without signing in, with downloads on or off, and can be made private again at any time. Every render can be downloaded in each of its sizes. Invite your team on the Team plan, and viewers can watch and comment without changing anything.
Point at a number, or at a line here, to light up its part.
Workspaces and keys
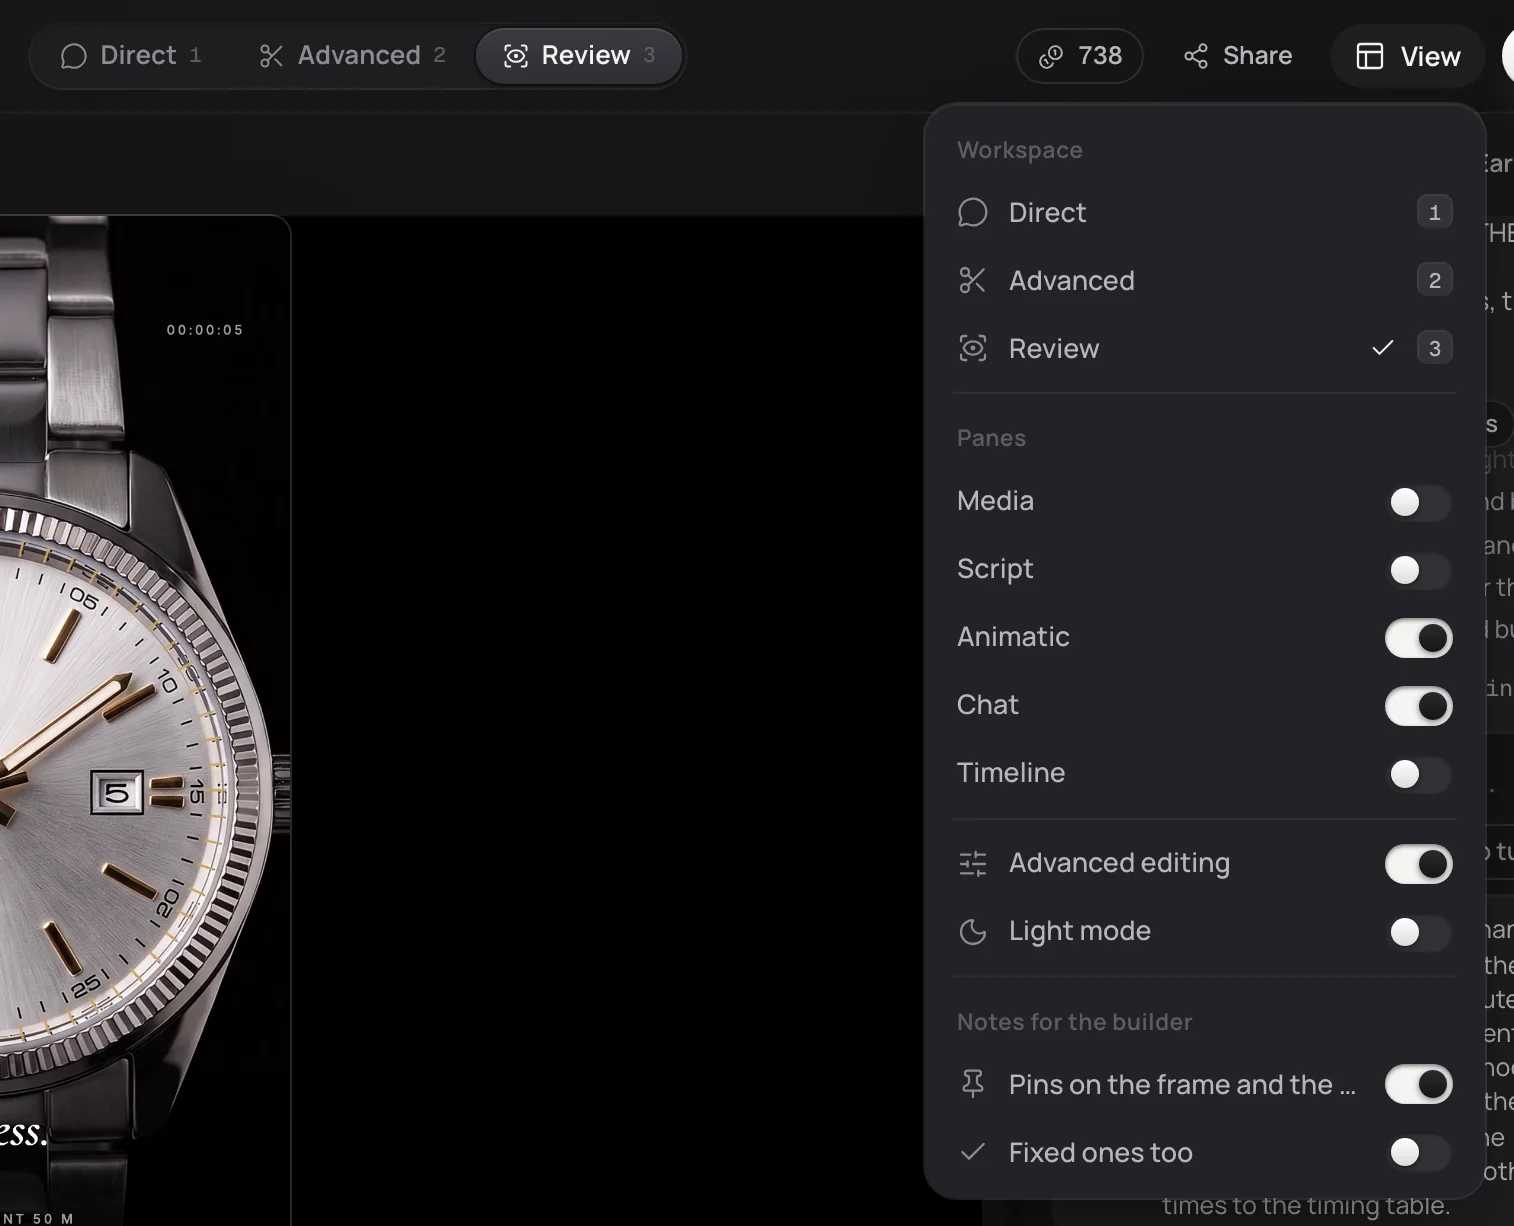
Three workspaces show what each kind of work needs: Direct (1) has your media, the video and the chat; Advanced (2) adds the script, the timeline and the inspector; Review (3) is the render and the chat. Show or hide any pane from View, and drag their edges to resize them. The project menu has a walk around the studio.
Point at a number, or at a line here, to light up its part.
- Space plays and pauses.
- M marks the moment of the playhead on the selected recording.
- The arrow keys move what is selected to the next line of the grid, and by a frame with Shift.
- Delete removes what is selected; the right button opens a menu of what can be done with it.
Credits
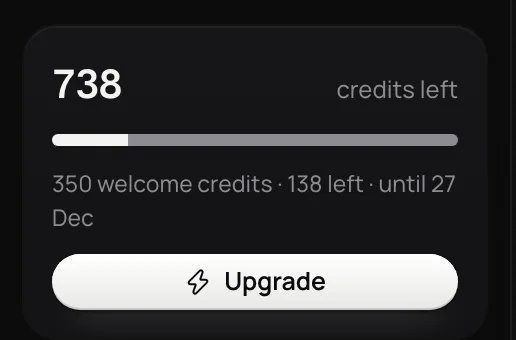
One balance pays for everything: planning in the chat, making the video, rendering, and any media you make. Anything that costs credits says roughly how much first, and you pay what it actually took. See Pricing for plans and top-ups.
Point at a number, or at a line here, to light up its part.